
 By Hashim Hashmi
Bicycle braking systems vary across disciplines, from lightweight dual-pivot road callipers to heavy-duty hydraulic disc setups. Knowing how to troubleshoot and adjust your specific setup keeps your rides safe and prevents premature wear on your components.
How do you diagnose what needs adjusting on your brakes?
Before turning a single bolt, you need to isolate whether your braking issue stems from excessive lever travel, uneven pad contact, or poor stopping power. Squeeze each brake lever firmly toward the handlebar grip to evaluate the baseline feel.
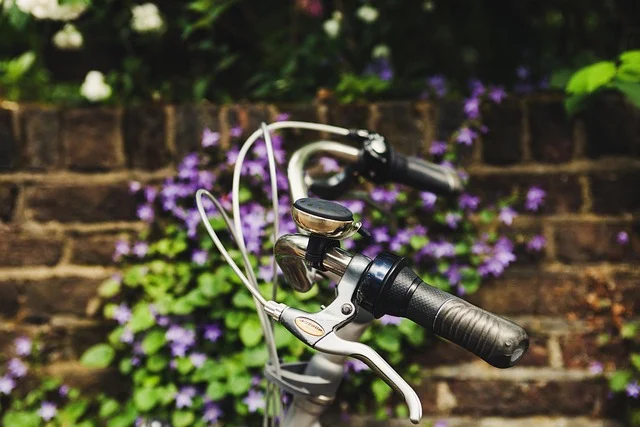
- Excessive lever movement: If the lever pulls all the way to the handlebar tape before engaging, the cable tension is too low or the hydraulic fluid level is low.
- Brake rub or dragging: If the wheel does not spin freely, one or both pads are touching the rim surface or disc rotor when the lever is released.
- Spongy lever engagement: On mechanical systems, this indicates cable stretch or housing compression. However, on hydraulic systems, it signals trapped air bubbles inside the line.
- Squealing or sudden loss of bite: This usually points to contaminated pads, uneven pad angles, or heavily glazed friction compounds rather than pure tension issues.
How do you adjust barrel adjusters for minor tension changes?
Barrel adjusters provide fine-grained cable tension adjustments without requiring tools. They are located where the brake cable housing enters the brake lever body or where it meets the calliper arm.
To take up slack, turn the knurled barrel adjuster counter-clockwise. This brings brake pads closer to the braking surface. The adjuster effectively lengthens the outer cable housing. It pulls the inner wire tighter. Once the lever engages at your preferred distance, spin the lock ring clockwise. This distance typically uses one-third of total lever travel. The lock ring fixes the adjuster in place. This is part of how to adjust the brakes on a bicycle.
If you have turned the barrel adjuster out by more than four or five full revolutions, the adjuster threads will become unstable. For how do you adjust the brakes on a bicycle, we recommend screwing the barrel adjuster back in almost entirely. Then reset tension at the main anchor bolt instead.
How do you adjust mechanical rim brakes?
Mechanical rim brakes come primarily in two designs: dual-pivot callipers found on road bikes, and linear-pull V-brakes common on hybrid, commuter, and mountain bikes. Both rely on standard steel inner cables, but their alignment methods differ.
Adjusting road dual-pivot callipers
Dual-pivot callipers feature two brake pads that squeeze inward against the aluminum or carbon wheel rim. To align and tension dual-pivot callipers, follow these steps:
- Align pad height and angle: Loosen the pad mounting bolt with a 4 mm or 5 mm Allen key. Position the pad so its top edge sits 1 mm below the outer edge of the tyre, parallel to the rim braking track. Ensure the pad does not touch the tyre sidewall, as rubbing will wear through the casing and cause a blowout.
- Reset cable tension: Ensure the quick-release lever on the calliper arm is turned down in the closed position. Next, loosen the cable anchor bolt. Pull the cable tight with pliers and tighten the anchor bolt to roughly 5–7 Nm of torque.
- Centre the calliper: Squeeze the brake lever hard three times to seat the cable. If one pad sits closer to the rim than the other, turn the small centring screw located on top of the calliper body using a 2 mm or 2.5 mm Allen key until both pads maintain an equal 1.5 mm gap from the rim.
Adjusting linear-pull V-brakes
V-brakes use two vertical calliper arms mounted on frame posts. They require precise spring tension balancing to ensure both arms retract evenly when you release the lever.
- Position the pads: Unhook the rubber boot and metal noodle to release tension. Loosen the washer stack on the brake pad post. Align the pad flat against the rim braking surface with slight toe-in—meaning the front tip of the pad touches the rim roughly 0.5 mm before the rear tip. This toe-in angle prevents brake squeal. Tighten the pad not securely while holding the pad firmly in place.
- Set cable distance: Rehook the metal noodle into the arm carrier. Loosen the cable pinch bolt. Squeeze the two calliper arms together until each pad sits roughly 2 mm from the rim. Then pull the inner wire taut, and tighten the pinch bolt.
- Balance spring tension: Locate the small Phillips-head or Allen screw at the base of each calliper arm near the frame mount. Turning this screw clockwise increases spring tension, pulling that arm away from the rim. If the left pad drags on the rim, turn the left screw clockwise or the right screw counter-clockwise until both arms move symmetrically when you pull the lever.
How do you adjust bicycle disc brakes?
Disc brakes offer strong stopping power in all weather conditions. However, tight tolerances mean minor misalignments cause noisy disc rotor rub. Disc brakes operate via mechanical cables or closed hydraulic fluid circuits.
Centring hydraulic and mechanical disc brake callipers
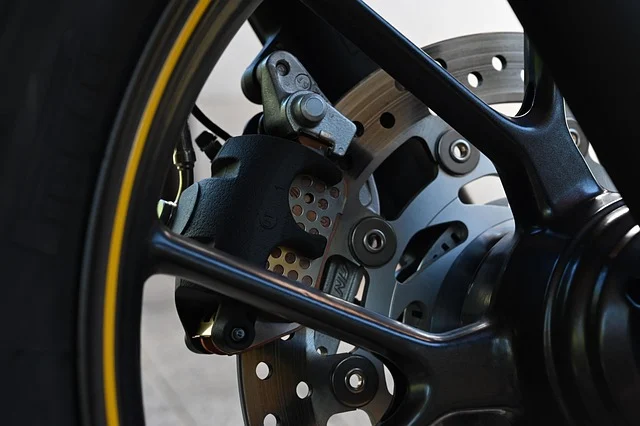
Most modern disc callipers use a post-mount or flat-mount standard that allows side-to-side adjustment via two main mounting bolts.
- Loosen calliper bolts: Using a 4 mm or 5 mm Allen key, loosen the two main calliper mounting bolts. Loosen them just enough so the calliper can slide freely side-to-side on its mounting slots. Do not remove the bolts completely.
- Squeeze and hold the brake lever: Pull the brake lever firmly against the handlebar and hold it tight (or secure it with a strap). Squeezing the lever forces the friction pads to clamp onto the steel rotor. As a result, this automatically centres the calliper over the rotor blade.
- Torque mounting bolts evenly: While keeping firm pressure on the lever, tighten the mounting bolts incrementally. Alternate between top and bottom bolts until both reach 6–8 Nm. Alternate tightening prevents the calliper from twisting out of alignment as the bolt heads bite down.
- Check for clear rotation: Release the lever and spin the wheel. Look down through the top of the calliper body against a light background. You should see a tiny gap of daylight on both sides of the rotor.
Adjusting pad reach on mechanical disc brakes
Unlike hydraulic callipers, which automatically push pistons inward as pads wear, basic mechanical disc brakes feature only one moving piston. The outer pad is pushed by the cable arm, forcing the rotor slightly inward against a stationary inner pad.
To compensate for pad wear, use a 3 mm or 5 mm Allen key. Insert it into the adjustment dial. This dial is on the back of the inner caliper body. Turn it clockwise in half-turn increments. This advances the inner pad closer to the rotor. Set this inner pad as close as possible without rubbing. This reduces rotor flex during braking. This is how you adjust the brakes on a bicycle, specifically single-piston mechanical disc brakes.
Comparison of bicycle brake types and adjustment methods
Different brake designs require distinct tools, maintenance schedules, and adjustment techniques. The table below outlines the mechanical differences for quick reference.
| Brake Type | Primary Adjustment Mechanism | Common Tools Needed | Main Cause of Dragging |
|---|---|---|---|
| Dual-Pivot Road | Centring screw & barrel adjuster | 2 mm, 4 mm, 5 mm Allen keys | Uncentred calliper body or sticky pivot bolt |
| Linear-Pull V-Brake | Spring tension screws & washer stack | 5 mm Allen key, Phillips screwdriver | Unequal spring tension or worn rim track |
| Mechanical Disc | Inner pad dial & mounting bolt centring | 3 mm, 4 mm, 5 mm Allen keys | Single-piston pad wear or slack cable |
| Hydraulic Disc | Floating calliper alignment & bleed port | 4 mm, 5 mm Allen keys, piston press | Sticky pistons or air bubbles in fluid line |
What should you do when basic adjustments do not solve brake rub?
If you have centred your calliper or balanced your spring tension and the brake still rubs, you are likely dealing with hardware issues rather than simple setup adjustments.

Correcting a warped disc rotor
Steel disc rotors can warp under extreme heat or accidental impact. Spin the wheel and look through the calliper body to find the exact point where the rotor wobbles into the pad.
Mark the spot. Rotate the wheel. The high point sits outside the calliper. Use a dedicated rotor truing fork or a clean adjustable spanner. Apply light, controlled pressure away from the bend. Flex the steel in tiny increments. This is for how you adjust the brakes on a bicycle. Also, avoid touching the braking surface with bare fingers. Skin oils contaminate friction pads.
Resetting sticky hydraulic pistons
If one piston on a hydraulic calliper fails to retract when you release the lever, the pad will drag continuously. Remove the wheel and brake pads. Clean around the exposed ceramic or metal pistons using isopropyl alcohol and a cotton bud.
Use a plastic tire lever or non-marring piston tool. Push both pistons flat back into the caliper body. Squeeze the brake lever gently a few times. Confirm both pistons extend evenly. If one remains stuck, hold the working piston back. Use a tire lever while gently pulling the brake lever. Force the stubborn piston to move. Clean its perimeter before resetting it again. This helps in how to adjust the brakes on a bicycle.
When is manual brake adjustment not suitable?
Not every brake issue can be resolved with adjustment tools at home. In several scenarios, attempting further adjustment is ineffective or unsafe, and components must be replaced.

- Worn friction material: If brake pad compound drops below 1 mm of thickness (or down to the metal backing spring on disc pads), adjusters will not restore stopping power. Therefore, pads must be replaced immediately.
- Hydraulic fluid contamination or pressure loss: If a hydraulic lever pulls soft and squishy even after centring the calliper, air has entered the closed system. This requires a full fluid flush and bleed using manufacturer-specific mineral oil or DOT fluid.
- Severe rim sidewall wear: Rim brake surfaces wear down over time under abrasive road grit. If the rim wear indicator groove disappears or the brake track feels concave, the rim structure is compromised and the wheel rim must be replaced.
- Frayed inner cables: Braided steel cables that have frayed near the anchor bolt cannot hold tension reliably. They will snap under heavy braking, so replace fraying cables immediately.
Related guides
Sources: Bicycle brake
Frequently asked questions
Why does my bicycle brake lever go all the way to the handle grip?
A lever touching the handlebar shows severe slack. This means cable slack or air in a hydraulic system. For cable brakes, tighten the cable. Use the main anchor bolt or barrel adjuster. Also, this is part of how you adjust the brakes on a bicycle. For hydraulic brakes, you must bleed trapped air.
How close should brake pads sit to the rim or disc rotor?
On rim brakes, pads should sit 1.5 mm to 2 mm away from the rim on each side. On disc brakes, the clearance is much tighter, generally around 0.5 mm to 1 mm between each pad and the rotor surface.
Should I lubricate my bicycle brake cables or callipers?
Apply a drop of light oil to caliper pivot points. Oil exposed inner cable wires. Never allow oil or grease to touch brake pads. Keep oil and grease from rim tracks or disc rotors. As a result, oil contamination ruins friction compounds. This leads to total stopping failure for how you adjust the brakes on a bicycle.
Why do my bicycle brakes squeal after adjusting them?
Squealing happens when pads are misaligned. Dirt or oil also contaminates them. For rim brakes, angling pads inward (toe-in) stops vibrations. This is part of how you adjust the brakes on a bicycle. For disc brakes, clean the rotor with isopropyl alcohol. Sand off any glazed pad surface.