
 By Hashim Hashmi
Whether you are tracking daily commute distances or following detailed turn-by-turn routing across unfamiliar lanes, choosing the right device comes down to how you collect and use your performance numbers. Smartphones offer basic tracking apps. Dedicated handlebar units provide superior daylight readability, rugged weatherproofing, longer battery runtimes, and immediate physical button control while riding.
Should you choose a smartphone or a dedicated head unit?
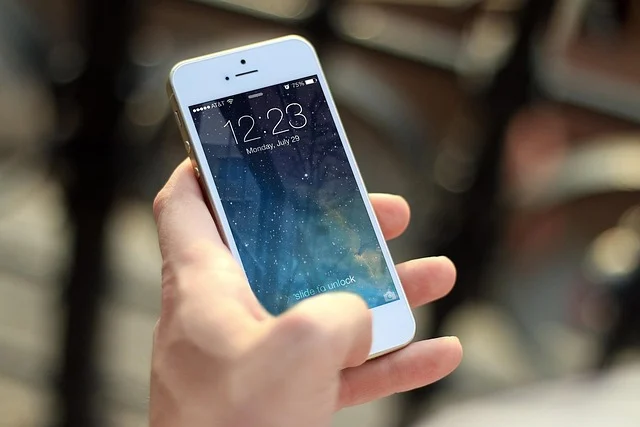
A dedicated head unit outperforms a smartphone on the handlebars in three main areas: screen visibility, battery longevity, and crash resilience. Smartphone displays rely on high backlight brightness to overcome direct glare from sunlight. This generates heat and rapidly drains lithium-ion batteries—often exhausting a full charge within two hours of continuous screen-on navigation. In contrast, a cycle bike computer uses transflective or memory-in-pixel screen technology that reflects ambient light. [viewedisplay.com] This makes the display clearer under harsh sunlight while consuming minimal power.
Vibration resistance is another critical distinction. Modern smartphone camera modules feature optical image stabilization mechanisms held by tiny suspension springs. Sustained high-frequency handlebar vibration from rough asphalt, gravel, or cobblestones can degrade these optical mechanisms over time. Handlebar computers rely on solid-state electronics sealed in water-resistant housings built to withstand rain, mud, and road chatter without risking expensive multi-purpose hardware.
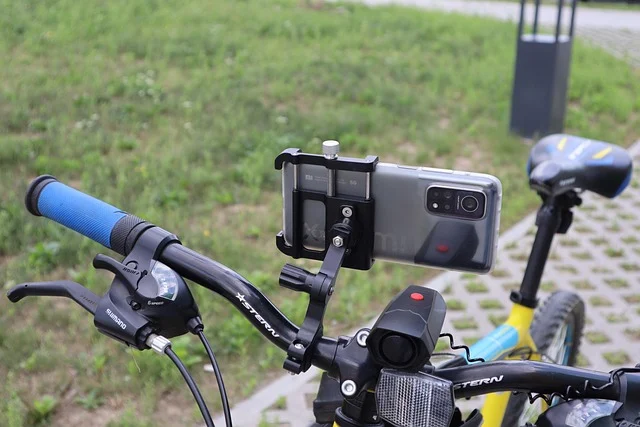
However, if you ride shorter utility journeys under ten miles and only want a quick record of total distance, mounting a phone using a mechanical twist-lock bracket is a sensible low-cost option. For structured training, long endurance rides, or navigational routing, a purpose-built head unit is considerably more practical.
How do basic magnet computers compare with GPS units?
Cycle bike computers fall into two main mechanical categories: traditional wheel-magnet sensors and integrated GPS units. Understanding the functional differences helps prevent overspending on features you may not need.
| Feature | Magnet-Based Computer | GPS-Enabled Computer |
|---|---|---|
| Speed Source | Wheel rotation count via spoken magnet | Satellite signal triangulation |
| Setup Complexity | Requires physical sensor alignment on fork/spoke | Press start and acquire satellite lock |
| Route Mapping | None | Turn-by-turn navigation and breadcrumb trails |
| Battery Life | 1 to 2 years (coin-cell battery) | 12 to 35 hours (rechargeable lithium) |
| Data Transfer | Manual entry or direct USB tethering | Automatic Wi-Fi or Bluetooth sync to cloud apps |
Magnet-based speedometers calculate velocity by measuring how quickly a spoke-mounted magnet passes a sensor secured to the front fork. To ensure accurate distance figures, you must measure your wheel’s rolling circumference in millimetres. Then, enter that precise number into the head unit software. These units are inexpensive and highly reliable in heavy tree cover or urban canyons. They run for months on a tiny coin-cell battery. They suit commuter bikes or indoor stationary setups where GPS signals cannot penetrate.
GPS units derive position, speed, and distance directly from satellite constellations such as GPS, GLONASS, and Galileo. They allow you to swap one computer across several bicycles without remounting physical wheel hardware. They also record location coordinates every second. This produces detail-rich ride files that upload automatically to analysis platforms once connected to your home network or smartphone.
Which core metrics and sensors do you actually need?
To avoid cluttering your display with unnecessary fields, decide which metrics actively inform your riding style. Basic speed and distance metrics satisfy general fitness riding. Structured training relies heavily on cadence, heart rate zones, and power balance.
Modern wireless sensors communicate using two primary protocols: ANT+ and Bluetooth Smart. ANT+ is a low-power wireless network protocol. It is capable of broadcasting a single sensor signal—such as a heart rate belt—to multiple receiving devices simultaneously. Bluetooth Smart operates on a point-to-point connection, usually pairing a sensor directly with a head unit or smartphone app. [support.garmin.com] Most current mid-range cycle bike computers feature dual-band chipsets, allowing them to connect with almost any modern wireless sensor.
- Speed Sensors: Magnetless hub sensors wrap around your front or rear wheel hub using an elastic strap. They contain internal accelerometers to calculate rotational speed without requiring sensor-to-magnet alignment on the fork legs.
- Cadence Sensors: Attached to the inner side of the non-drive crank arm, cadence sensors measure crank revolutions per minute. Maintaining a cadence between 85 and 95 RPM generally reduces muscular strain on long climbs. This is better than pushing heavy gears at lower pedal speeds.
- Heart Rate Monitors: Chest straps measure electrical impulses from cardiac activity. They provide more immediate response to changes in effort than wrist-based optical sensors. Chest straps are often found to be far more reliable during quick interval efforts.
- Power Meters: Built into crank arms, pedal spindles, or spider assemblies, power meters measure actual kinetic force in watts. Power offers an objective, absolute measurement of effort unaffected by wind, fatigue, elevation, or caffeine intake.
How do you correctly mount and configure your head unit?
Proper physical installation prevents mount slippage, vibration noise, and visual distractions while riding. Follow these practical steps to secure your hardware:
- Position the mount: Attach an out-front handlebar mount to the non-drive side of your stem faceplate. Out-front mounts place the screen directly in your forward field of view. You can glance at route lines without shifting your head down away from the road ahead.
- Torque the clamp hardware: Tighten the mount clamp bolt to the manufacturer’s specified limit—typically between 1.5 Nm and 2.0 Nm. Avoid overtightening on carbon fibre handlebars to prevent crushed composite layers; use a dedicated assembly paste if slipping occurs.
- Secure the safety tether: Loop the nylon safety lanyard around the handlebar before twisting the computer into its quarter-turn or eighth-turn base. If an unexpected impact strikes the unit, the tether keeps the computer hanging safely rather than bouncing into traffic.
- Calibrate wheel circumference (optional): If using a dedicated hub speed sensor alongside GPS for dense woodland riding, perform a roll-out test. Align your tire valve perpendicular to the floor. Mark the ground. Roll the bike forward in a straight line for one full wheel rotation. Measure the precise distance in millimetres between the two marks. Enter this exact figure into your sensor settings menu.
Understanding screen displays, mapping, and battery management
Display technology directly influences how long a unit runs between charges. Full-color touchscreen head units offer fluid pan-and-zoom map navigation similar to a smartphone. However, they consume battery power rapidly when calculating dynamic rerouting. If you frequently take unpaved detours, choose a model that features dedicated physical side buttons. Touchscreens can become unresponsive when coated in mud or operated with rain-soaked gloves.

Monochrome or two-color displays with static button navigation require less processing power. This allows battery runtimes to exceed 24 hours of continuous logging. Some high-end endurance devices integrate solar charging panels directly around the screen bezel. This extends runtimes by several hours on clear summer days.
For routing, check whether a device offers turn-by-turn navigation with map layers or simple breadcrumb trails. Breadcrumb tracking draws a simple line on a blank screen showing your pre-planned course path. While functional in open country, breadcrumb displays offer little context at complex five-way road junctions. Full vector maps show street names, terrain contours, and surrounding paths. This helps you make informed choices if road closures force an detour.
Who should avoid buying a high-end cycle bike computer?
Full-featured GPS cycling computers are often unnecessary for casual riders. If your riding consists entirely of familiar paths or daily commutes to work, a dedicated head unit adds setup steps and extra charging responsibilities without proportional benefit.
Riders who already own a GPS sports watch with dedicated cycling modes can broadcast heart rate data to a cheap handlebar mount or rely on audio prompts sent to open-ear headphones. Similarly, if you do not plan to track performance data over time or analyze post-ride files, a basic sub-£25 wired speedometer gives accurate speed and distance measurements without software updates or wireless setup.
Frequently asked questions
Can I use a cycle bike computer on an indoor smart trainer?
Yes, most cycle bike computers pair directly with indoor smart trainers using ANT+ FE-C or Bluetooth protocols. The head unit can log indoor workouts, record virtual distance and power output. It can even control resistance levels for structured interval sessions without needing a computer or tablet screen.
Why does my GPS bike computer show incorrect elevation gains?
Elevation errors usually happen when dirt, moisture, or soapy water blocks the small barometric altimeter port holes on the underside of the device case. Keep these port openings clean and dry. Allow the computer a few minutes outside before riding so the sensor can adjust to ambient atmospheric temperature.
How long do batteries last in wireless bike sensors?
Standard CR2032 coin-cell batteries in wireless cadence, speed, and chest-strap heart rate sensors typically last between 200 and 400 hours of active riding. Most head units display a low-battery notification on screen when a paired sensor’s voltage drops below recommended operational limits.
Do I need an active internet connection on my bike computer while riding?
No, cycle bike computers do not require an active cellular connection to log speed, distance, or route navigation. GPS positioning works via satellite signals, and onboard maps are saved directly to the device memory, though live weather updates and emergency crash alerts do require a companion smartphone Bluetooth connection.