
 By Hashim Hashmi

As experienced riders, the difference a properly sized bike makes is known. It’s not just about avoiding discomfort; it’s about optimizing power transfer, handling, and long-term enjoyment. While a professional bike fit is the gold standard, knowing how to interpret a bike size chart provides an excellent starting point for a next purchase.
How is Bike Size Determined? Key Measurements Explained
Bike size is determined by a combination of important rider measurements and specific bicycle geometry metrics. This ensures the bike aligns with your body for an ergonomic and efficient riding position.

The primary measurements for bike sizing focus on your body’s dimensions: rider height and inseam. While overall height provides a general guideline, inseam length (inside leg measurement) is often a more critical factor, particularly for road and mountain bikes. This is because leg length directly impacts the important saddle height and standover clearance.
Bike frame and wheel size
Beyond these rider-specific measurements, the bike’s geometry also plays a significant role:
- Frame Size: This traditionally refers to the length of the seat tube, measured from the centre of the bottom bracket to the top of the seat tube. It’s often expressed in centimetres for road bikes (e.g., 52cm, 54cm) or inches for mountain bikes (e.g., 17″, 19″). Some modern brands also use letter sizes (S, M, L, XL).
- Wheel Diameter: Important for kids’ bikes, where sizing is primarily based on wheel diameter (e.g., 12-inch, 20-inch, 24-inch). For adult bikes, wheel diameter (e.g., 26″, 27.5″, 29″, 700c) influences handling but is less a sizing factor than frame size.
- Standover Height: This is the clearance between the top tube and your crotch when standing over the bike with both feet flat on the ground. It’s a critical safety check. Ideally, you want 1-2 inches (2.5-5 cm) for road/hybrid bikes and 2-4 inches (5-10 cm) for mountain bikes, according to general guidelines. This ensures you can dismount quickly and safely.
- Reach: The horizontal distance from the centre of the bottom bracket to the top centre of the head tube. This measurement dictates how stretched out you will be when reaching for the handlebars.
- Stack: The vertical distance from the centre of the bottom bracket to the top centre of the head tube. Therefore, stack influences how upright or aggressive your riding position will be.
It’s a common misconception that rider height alone directly determines the correct frame size. While a tall person generally needs a larger bike, individual body proportions, such as leg and torso length, are more important for achieving a truly comfortable and efficient fit.
How to Measure Yourself for a Bike Size Chart
Accurately measuring your height and inseam is the first practical step in using any bike size chart effectively. This provides the foundational data for your bike selection.
Measuring Your Height
- Stand Straight: Stand barefoot with your back against a wall, feet together.
- Use a Flat Object: Place a ruler or a flat book on top of your head, parallel to the floor.
- Mark the Spot: Have someone mark where the bottom of the ruler/book meets the wall.
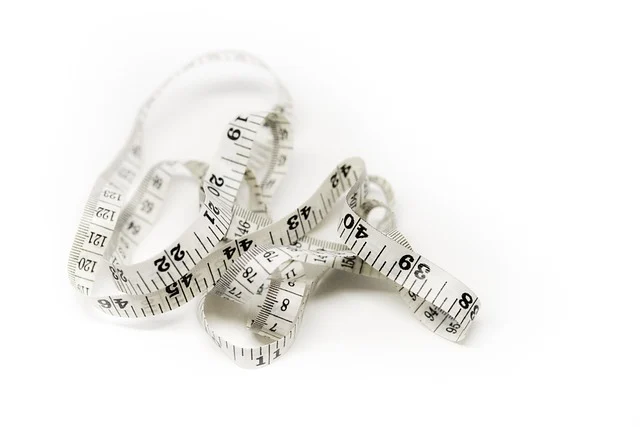
- Measure: Use a tape measure to find the distance from the floor to the mark. Thus, this is your height.
Measuring Your Inseam (Inside Leg Length)
This measurement is particularly important for determining standover height and initial saddle height. Here’s how we recommend doing it:
- Barefoot Against a Wall: Stand barefoot with your back against a wall, feet about 6 inches (15 cm) apart.
- Use a Book or Level: Place a large, hardback book or a carpenter’s level firmly between your legs, pushing it up as if it were a bike saddle. First, ensure it’s level and snug against your perineum.
- Mark and Measure: Have someone measure the distance from the top edge of the book/level down to the floor. This is your inseam measurement. It is helpful to repeat this a couple of times to ensure accuracy.
What Bike Size Chart Should You Use?
The specific bike size chart you should use depends heavily on the type of bicycle you are considering. Sizing conventions vary significantly between road, mountain, hybrid, and kids’ bikes.

It’s important to remember that there is no single universal bike size chart. Sizing can vary significantly between different brands and even between models from the same manufacturer. Many modern bike brands now use their own proprietary sizing systems, such as Specialized S-Sizing or Giant’s XS-XL system. These systems move beyond traditional measurements to offer a more nuanced fit based on riding style and geometry.
Road Bike Size Chart
Road bikes are typically sized in centimetres, usually correlating to the seat tube length. These charts often use your inseam or height as the primary input.
Example Road Bike Size Chart (General Guide):
| Rider Height (cm) | Inseam (cm) | Frame Size (cm) | Who it suits |
|---|---|---|---|
| 152-160 | 68-74 | 47-50 | Shorter riders seeking an agile fit. |
| 160-168 | 74-79 | 50-52 | Compact riders, often preferring a racier position. |
| 168-175 | 79-82 | 52-54 | Average height riders, a common ‘medium’ size. |
| 175-183 | 82-86 | 54-56 | Taller riders, balancing comfort and performance. |
| 183-191 | 86-90 | 56-58 | Very tall riders, for extended reach and stability. |
| 191+ | 90+ | 58+ | Exceptionally tall riders requiring maximum frame size. |
When selecting a road bike, we advise paying close attention to the brand’s specific chart, as a 54cm from one manufacturer might feel different from another. Also consider reach and stack, as these significantly impact your riding posture.
Mountain Bike Size Chart
Mountain bikes commonly use inches (referring to seat tube length) or letter sizes (S, M, L, XL). Modern mountain bike sizing often prioritizes reach and standover height for better handling on varied terrain.
Example Mountain Bike Size Chart (General Guide):
| Rider Height (cm) | Inseam (cm) | Frame Size (inches / letters) | Who it suits |
|---|---|---|---|
| 150-160 | 66-74 | 14-15″ / XS-S | Smaller riders needing nimble handling. |
| 160-170 | 74-79 | 16-17″ / S-M | Average height riders, good for technical trails. |
| 170-180 | 79-84 | 17-18″ / M-L | Taller riders, balancing stability and control. |
| 180-190 | 84-89 | 19-20″ / L-XL | Very tall riders, for improved stability at speed. |
| 190+ | 89+ | 21+” / XL-XXL | Exceptionally tall riders, maximizing frame size. |
For mountain biking, standover height is paramount for safety when dismounting quickly on uneven ground. Always check that there is at least 2-4 inches of clearance over the top tube.
Hybrid and City Bike Size Chart
Hybrid and city bikes typically offer a more relaxed geometry than road or mountain bikes, often using letter sizing or a combination of height and inseam for a comfortable, upright riding position.
Example Hybrid Bike Size Chart (General Guide):
| Rider Height (cm) | Inseam (cm) | Frame Size (inches / letters) | Who it suits |
|---|---|---|---|
| 147-157 | 66-71 | 13-15″ / XS-S | Shorter commuters and casual riders. |
| 157-168 | 71-76 | 15-17″ / S-M | Average height riders seeking comfort. |
| 168-178 | 76-81 | 17-19″ / M-L | Taller riders for a balanced, upright stance. |
| 178-188 | 81-86 | 19-21″ / L-XL | Very tall riders, prioritising stability. |
| 188+ | 86+ | 21+” / XL-XXL | Exceptionally tall riders for maximum comfort. |
Kids’ Bike Size Chart
Kids’ bikes are primarily sized by wheel diameter, with age serving as a rough guide, as children’s growth rates vary significantly.
Example Kids’ Bike Size Chart (General Guide):
| Age (Years) | Rider Height (cm) | Inseam (cm) | Wheel Size (inches) | Who it suits |
|---|---|---|---|---|
| 2-4 | 85-100 | 35-45 | 12 | First balance bikes or pedal bikes. |
| 4-6 | 100-115 | 45-55 | 16 | Young riders gaining confidence. |
| 6-9 | 115-135 | 55-63 | 20 | Developing riders, often with gears. |
| 9-12 | 135-145 | 63-70 | 24 | Pre-teen riders transitioning to adult bikes. |
| 12+ | 145+ | 70+ | 26+ (XS adult bikes) | Teenagers nearing adult bike sizes. |
When buying a kids’ bike, we always recommend prioritising a bike that fits them now, rather than one they will ‘grow into’. A bike that is too large can be unsafe and off-putting, hindering their confidence and skill development. Ensure they can comfortably touch the ground with their toes, and ideally, have good standover clearance.
What If You Are Between Bike Sizes?
When your measurements place you between two sizes on a bike size chart, your riding style and specific body proportions should guide your decision, as both options offer distinct advantages.

This is a common scenario, and how you approach it depends on your preferences:
- Size Down for Agility: Choosing the smaller frame generally results in a more agile, responsive feel. It can offer more standover clearance, which is beneficial for technical riding (especially mountain biking) or for those who prefer a more compact, upright position. You can often compensate for a slightly shorter reach by extending the seat post and potentially using a longer stem. However, we advise against overly long stems as they can negatively affect handling.
- Size Up for Stability and Comfort: Opting for the larger frame typically provides more stability, particularly at speed. It can also offer a more stretched-out, comfortable position for longer rides. This might suit touring cyclists or those who prioritise endurance over quick maneuvers. However, be cautious not to go too large, as this can lead to being overly stretched, reduced standover clearance, and difficulty handling the bike. A common misconception is that a larger bike size provides more power or speed.
Consider your body proportions
Your unique body proportions also play a role. If you have a longer torso and shorter legs for your height, you might lean towards a larger frame to get the necessary reach. Conversely, if you have longer legs and a shorter torso, sizing down might be more appropriate to maintain adequate standover height while adjusting reach with a longer stem or setback seatpost.
Ultimately, when in doubt, we always recommend a test ride. Even a short spin can reveal how a bike truly feels and whether it aligns with your preferences. This hands-on experience often clarifies the decision better than any chart alone.
How to Check If a Bike is the Right Size
Beyond the numbers on a bike size chart, checking several key fit points will confirm if a bike is truly the right size for you, ensuring comfort, control, and efficiency.

Once you have a bike, or are test riding one, perform these checks:
- Standover Height: Stand over the top tube with both feet flat on the ground. For example, you should have 1-2 inches (2.5-5 cm) of clearance for road/hybrid bikes and 2-4 inches (5-10 cm) for mountain bikes. Because the top tube might press against you, the bike is too large if this happens.
- Saddle Height: When sitting on the saddle, your leg should have a slight bend at the knee (approximately 25–30 degrees) at the bottom of the pedal stroke. Your heel should just touch the pedal when it’s at its lowest point with a straight leg. If your hips rock to reach the pedals, the saddle is too high. If your knee is bent too much, it’s too low. (For more on this, see Best Puncture Proof Road Bike Tyres for Reliable Rides for sizing).
- Reach to Handlebars: When sitting comfortably on the saddle with your hands on the handlebars, you should have a slight bend in your elbows. Your torso should typically be at a 45-degree angle for road bikes or more upright for hybrid/city bikes. You shouldn’t feel overly stretched or cramped. A quick check often used is to look down at your front hub. If the handlebars obscure the hub, your reach is likely good.
- Knee-Over-Pedal Spindle (KOPS): While not a definitive rule, for many riders, with the pedals level (3 o’clock and 9 o’clock position), a plumb line dropped from the front of your kneecap should pass through the pedal spindle. This helps with efficient power transfer and comfort.
- Comfort and Control: Ultimately, the bike should feel comfortable and controllable. You should be able to steer easily, shift gears without strain, and brake effectively. Any significant discomfort, numbness, or pain during a short test ride is a strong indicator of an improper fit.
Remember, these are general guidelines. The most accurate way to confirm bike size and achieve an optimal fit is always a test ride at a local bike shop, where experts can observe your riding position and make adjustments, or through a professional bike fit service.
Frequently asked questions
What size bicycle is right for my height?
The right bicycle size for your height depends on the bike type. While height provides a general guide, your inseam length is often more important. Road bikes typically use centimetre frame sizes, mountain bikes use inches or letter sizes, and kids’ bikes are sized by wheel diameter.
What height is a 26-inch bike for?
A 26-inch bike usually refers to the wheel size. It is typically suitable for older children (around 12+ years) or smaller adults, generally those with a height of approximately 145 cm to 165 cm (4’9″ to 5’5″). However, adult bikes with 26-inch wheels are often mountain bikes. There, frame size is the primary sizing factor, not just wheel diameter.
What does 24 or 26-inch bike mean?
For children’s bikes, “24-inch” or “26-inch” refers to the diameter of the wheel. This is the primary sizing metric for kids’ bikes. For adult mountain bikes, “26-inch” also refers to the wheel diameter. However, the bike’s overall size is determined by its frame size (e.g., small, medium, large, or specific frame measurements in inches).
Is a 27-inch bike good for what height?
A “27-inch bike” usually refers to a wheel size of 27.5 inches (650b), common in mountain bikes. Or it could be a 27-inch road bike wheel which is less common today than 700c. For a bike with 27.5-inch wheels, the appropriate rider height will depend on the frame size. But generally, riders from around 160 cm (5’3″) upwards can comfortably ride bikes with this wheel size, assuming the frame is correctly proportioned to their height and inseam.