
 By Hashim Hashmi

Many cyclists view wheel truing as a dark art reserved for professional mechanics. However, any home mechanic can learn this skill with patience and the right approach. It directly impacts the riding experience, from how smoothly a bike rolls to how effectively its brakes engage. A wheel that is out-of-true can cause brake rub, imprecise handling, and even lead to premature wear on components.
What Does ‘Truing a Bike Wheel’ Actually Mean?
Truing a bike wheel is the process of adjusting spoke tension to correct how straight (lateral trueness) and round (radial trueness) the wheel spins. Beyond these two primary aspects, truing also involves ensuring the rim is centred over the hub, a measurement known as “dish,” and that spoke tension is evenly balanced across the wheel. A bicycle wheel’s structure relies entirely on balanced spoke tension, with spokes connecting the hub to the rim via nipples.
Lateral trueness means side-to-side rim straightness. If a rim wobbles while spinning, it has lateral runout. Radial trueness, in contrast, means roundness, correcting up-and-down movement for how to true a bike wheel. An out-of-round wheel feels bumpy and causes uneven brake engagement.

A common misconception is that truing a bike wheel is only a cosmetic fix. It is a structural adjustment that improves braking, handling, and extends wheel life. While perfect trueness is always the goal for professional builders, a functionally true wheel with slight runouts (a few millimetres) is often acceptable for everyday riding. This is especially true if it doesn’t rub on brakes or the frame.
Can You True a Bike Wheel at Home? Is It Hard?
Yes, you can absolutely true a bike wheel at home. It requires patience and a methodical approach. We would not describe it as inherently hard. It’s more about understanding the mechanics and making small, precise adjustments rather than brute force. The fundamental principles of how a bicycle wheel works and how to true it have not changed in hundreds of years. This means the core skills are timeless.

For a beginner, the initial challenge is developing a feel for how spoke adjustments affect the rim. It’s common to over-correct at first, but with practice, you’ll develop a knack for it. We always recommend starting with a less critical wheel, perhaps an old spare, to get a feel for the process before tackling your primary riding wheels. The most important thing is to take your time; rushing often leads to more problems than it solves.
What Tools Do You Need to True a Bike Wheel?
To effectively true a bike wheel, a few essential tools will make the job much easier and more accurate. You can perform rough truing on the bike. However, dedicated tools offer precision and efficiency.
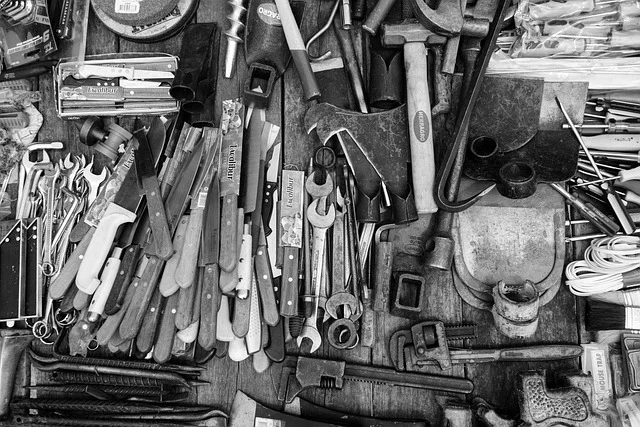
- Spoke Wrench: This is non-negotiable. You’ll need one that precisely fits your wheel’s spoke nipples. Nipples come in various sizes (e.g., 3.23mm, 3.30mm, 3.45mm, 3.96mm, 4.4mm), so check your wheel’s specifications or use a multi-size wrench. Using the wrong size can round off the nipple, making future adjustments impossible.
- Truing Stand: While not strictly essential for basic truing, a truing stand is invaluable. It holds the wheel securely and provides fixed reference points for precise measurements of lateral and radial deviations. Professional truing stands can range from £80 to £500, offering features like dial indicators or integrated dishing tools.
- Dishing Gauge (Dish Stick): This tool checks if the rim is correctly centred over the hub. While not needed for lateral or radial truing, it’s important for a perfectly built or repaired wheel.
- Tensiometer (Optional but Recommended): This tool measures and equalizes spoke tension. It’s important for the wheel’s structural integrity and longevity, helping to prevent future wobbles. Rim manufacturers typically specify a recommended or maximum spoke tension, often around 120 Kgf or 1200N per spoke.
Truing a Bike Wheel Without a Truing Stand or Specialized Tools
For those without a dedicated truing stand, you can still achieve a functional level of trueness on the bike itself. This method uses the bike’s frame and brakes as your reference points.
To check for lateral trueness, you can use your brake pads as indicators. Spin the wheel slowly and watch for the rim’s proximity to the brake pads. Alternatively, you can attach zip ties to your fork blades or seat stays, positioned so their ends are just a millimetre or two from the rim. These act as makeshift calipers, making wobbles more visible.
For radial trueness, the brake pads can also help, but it’s often easier to use a zip tie. Attach it to your fork or seat stay, positioning the end to just clear the highest point of the rim. As the wheel spins, you’ll clearly see any high or low spots.
While this ‘on-bike’ method is effective for identifying significant issues, it lacks the precision of a truing stand. It’s an excellent way to get a wheel functional enough for a ride or until you can invest in a stand.
How to True a Bike Wheel: Step-by-Step Process
Before you begin, remove the tyre and inner tube from the wheel. This gives you a clear view of the rim and nipples, essential for how to true a bike wheel. Always start with a clean wheel.
1. Initial Inspection and Preparation
- Mount the Wheel: If you have a truing stand, mount the wheel securely. If working on the bike, ensure it’s stable, preferably in a work stand.
- Check for Damage: Inspect the rim for any dents, cracks, or severe bends. If the rim is physically damaged, truing might not be possible, or the wheel may be beyond saving.
- Lubricate Nipples (Optional but Recommended): A drop of light oil on each nipple where it meets the rim can prevent seizing and make adjustments smoother.
- Loosen All Spoke Nipples Slightly: Some mechanics prefer to slightly loosen all nipples by a quarter or half turn to relieve any existing tension and allow for a fresh start. This isn’t strictly necessary for minor corrections but can be helpful for more significant truing.
2. Lateral Truing (Side-to-Side Wobble)
Lateral truing addresses the side-to-side wobble of the rim. This is often the most noticeable issue and the best place to start. Acceptable lateral runout for a functional wheel is generally considered to be within 1 to 2 millimetres. However, professional builders aim for tighter tolerances, such as 0.5mm or even +/- 0.15mm.
- Identify the Wobble: Spin the wheel slowly. Use your truing stand’s calipers, brake pads, or zip ties as reference points. Watch for areas where the rim touches or comes very close to the indicator on one side.
- Locate the Apex of the Wobble: Stop the wheel when the rim is at its furthest point to one side. Mark this section with a piece of tape or a marker.
- Make Adjustments:
- If the rim bulges to the right, you need to pull it to the left. To do this, tighten the spokes on the left side of the wheel in that marked area and/or loosen the spokes on the right side.
- If the rim bulges to the left, you need to pull it to the right. To do this, tighten the spokes on the right side of the wheel in that marked area and/or loosen the spokes on the left side.
- Adjust Incrementally: Making large adjustments to spoke nipples (e.g., full turns) is a common mistake. We recommend small, incremental adjustments (quarter or half turns) to avoid over-correcting and creating uneven spoke tension. Adjust 2–3 spokes around the apex of the wobble.
- Re-check and Repeat: Spin the wheel again. You should reduce the wobble. Continue this process. Gradually work around the wheel, reducing the high spots until the lateral runout is within acceptable limits.
3. Radial Truing (Up-and-Down Movement)
Once you largely sort lateral trueness, focus on radial trueness. This ensures the wheel is round. Acceptable radial runout for a functional wheel, in how to true a bike wheel, also typically falls within 1 to 2 millimetres. Professionals aim for 0.5mm or less.
- Identify High Spots: Spin the wheel and use your truing stand’s radial indicator (or a zip tie on the fork/stay) to find areas where the rim is furthest from the hub (a ‘high’ spot).
- Adjust High Spots: To pull a high spot closer to the hub, you need to tighten all spokes (both left and right) in that area. Again, make small, incremental adjustments (quarter turns) to 2–4 spokes in the affected section.
- Identify Low Spots: Less common, but sometimes the rim can have a ‘low’ spot where it dips towards the hub.
- Adjust Low Spots: To push a low spot away from the hub, you need to loosen all spokes (both left and right) in that area.
- Re-check and Repeat: Spin the wheel and continue adjusting until the radial runout is minimal. Radial truing can affect lateral trueness, so you might need to go back and forth between the two.
4. Checking and Correcting Dish
Dish ensures the rim is perfectly centred between the hub’s locknuts. This is especially critical for rear wheels and disc brake wheels. You’ll need a dishing gauge for this.
- Measure One Side: Place the dishing gauge across the rim on one side, ensuring the central rod touches the hub’s locknut. Lock the rod in place.
- Flip the Wheel: Turn the wheel over and place the gauge on the opposite side without adjusting the rod.
- Compare: If the central rod no longer touches the locknut, the wheel is out of dish. For example, if the rod is now too short to reach the locknut, the rim has shifted towards the side you first measured.
- Adjust Dish: To correct dish, you need to shift the entire rim. If the rim needs to move to the left, loosen all spokes on the right side slightly and tighten all spokes on the left side slightly. Do this incrementally, perhaps a quarter turn at a time, working evenly around the wheel.
- Re-check: Repeat the dishing measurement until the gauge reads the same on both sides.
5. Equalizing Spoke Tension (Using a Tensiometer)
Even spoke tension is important for a durable wheel. While you can get close by feel (plucking spokes and listening to the pitch), a tensiometer provides precise, measurable data.
- Measure Each Spoke: Follow your tensiometer’s instructions to measure the tension of every spoke on the wheel. Record the readings, perhaps in a simple table.
- Identify Discrepancies: Compare the readings to the manufacturer’s recommended tension and identify spokes that are significantly tighter or looser than the average.
- Adjust for Evenness: Gradually tighten loose spokes and loosen tight spokes to bring them closer to the average tension, always keeping an eye on lateral and radial trueness. This is a delicate balance.
- De-stress the Wheel: After significant tension adjustments, it’s important to ‘de-stress’ the wheel. Lay the wheel flat on a clean, soft surface and lean on the rim with your body weight, pushing down evenly on both sides. You might hear creaking sounds as spokes seat themselves. This helps to settle the spokes and nipples, preventing them from loosening prematurely. Repeat this several times, then re-check trueness and tension.
Common Mistakes and What to Avoid
When truing a wheel, we have observed several common pitfalls. These can make the process more frustrating or even damage the wheel:

- Over-adjusting: The biggest mistake is making large turns of the spoke wrench. Small, quarter-turn adjustments are key. It’s easy to over-correct and chase wobbles around the rim.
- Ignoring Spoke Tension: Only focusing on lateral and radial trueness without considering overall and even spoke tension can lead to a wheel that quickly goes out-of-true again or even breaks spokes.
- Truing with the Tyre On: While possible for minor tweaks, the tyre and tube can mask subtle deviations and make precise adjustments difficult. Always remove them for serious truing.
- Uneven Lubrication: If some nipples are seized and others are free, you’ll struggle to make even adjustments. Lubricating all nipples before starting helps.
- Not De-stressing: Skipping the de-stressing step can mean your freshly trued wheel goes out of whack after your first hard ride.
- Ignoring Rim Damage: If the rim itself is bent or dented beyond a certain point, no amount of truing will fix it. Know when a wheel is past saving.
Truing a wheel requires patience and a systematic approach. It’s a skill that improves with practice. Successfully truing your own wheels is a deeply satisfying part of bike maintenance. By understanding the principles and making careful, incremental adjustments, you can keep your wheels running true and extend their lifespan considerably.