
 By Hashim Hashmi

To clean a bike chain effectively, apply a dedicated bike degreaser, thoroughly scrub each link with a stiff brush, then rinse with clean water to remove all dirt and residue. After completely drying, apply one drop of chain lubricant to each roller and meticulously wipe off any excess for optimal performance and longevity.
Maintaining a clean drivetrain is one of the most effective ways to preserve smooth gear shifting, save watts, and extend the lifespan of your bicycle components. Dirt, road salt, silica grit, and old lubricant combine to form an abrasive grinding paste that wears down chain rollers, cassette cogs, and chainring teeth prematurely. Regular chain cleaning protects your investment in expensive groupsets and ensures crisp, silent gear changes.
Why should you clean your bike chain?
A bicycle chain serves as the direct mechanical link between your pedalling effort and the rear wheel. When you ride through rain, dust, or mud, small particles of grit adhere to the oily surface of the chain links. As the chain bends around derailleur pulley wheels, cassette cogs, and chainrings, these trapped particles act like liquid sandpaper, carving away metal from internal chain pins and outer plates.
Over time, this metal erosion causes the chain to elongate, a condition commonly referred to as chain stretch. An elongated chain no longer fits precisely into the tooth valleys of your cassette and chainrings, rapidly filing down the cogs into hooked shapes. Replacing a worn chain early costs significantly less than replacing an entire worn cassette and chainring set. A dirty, gummed-up chain also introduces mechanical drag, consuming pedalling power and making your gears shift poorly.
When to clean your bike chain
The frequency of cleaning depends on your riding conditions, mileage, and the type of lubricant you use. As a general rule, it’s better to clean your chain more often than less.
- Dry road riding: Wipe down the chain with a rag after every 100–150 miles or after every few rides. Perform a full degreaser clean every 300–500 miles.
- Wet or winter commuting: Wipe down and re-lube after every wet ride. Perform a full degreaser clean weekly or bi-weekly.
- Off-road (gravel and mountain biking): Wash and re-lube the chain after every muddy or exceptionally dusty ride. Deep clean with degreaser every 2–4 rides.
Beyond mileage, clean your chain whenever it looks visibly dirty, feels gritty to the touch, or if your shifting performance degrades. Grinding noises from your drivetrain are a clear sign that cleaning is overdue.
What to clean bike chain with: Tools and degreasers
Choosing the right degreaser formula
Bicycle degreasers fall into three primary categories:
- Citrus-based degreasers: Biodegradable and effective, these are safe for painted frames and alloy components. They may require more scrubbing for heavy grime but are safe for home use.
- Solvent-based degreasers: High-strength chemicals that cut through grime fast. They require excellent ventilation, gloves, and careful handling to avoid damaging plastic or rubber seals. Preferred for very stubborn, old grease.
- Aqueous biodegradable cleaners: Water-activated degreasers using surfactants. Safer for the environment and user, but often require longer dwell time and thorough scrubbing.
Avoid using petrol, diesel, or industrial acetone. Petrol leaves a film, poses fire hazards, and degrades rubber and plastic. WD-40 can displace water and clean, but it’s not a true lubricant; it must be thoroughly wiped off and followed by a proper bike chain lube.
Brushes and workshop tools
Effective cleaning requires specific mechanical tools:
- Stiff-bristled brushes: A dedicated three-sided drivetrain brush or a firm toothbrush reaches between outer chain plates and inner link rollers.
- Cassette claw tool: A plastic tool with serrated teeth to scrape compacted grime out of cassette cogs. A thin, flat screwdriver can also work carefully.
- Microfibre towels and rags: Essential for wiping away sludge, drying the chain, and wiping off excess lubricant.
- Chain wear indicator: A drop-in measuring tool that checks internal pin wear to indicate when the chain requires replacement, preventing premature wear on your cassette and chainrings.
- Quick-link pliers: Specialised pliers designed to open master links without damaging the chain plates.
- Work stand (optional): Makes the cleaning process significantly easier by holding the bike stable and at an accessible height.
Tools and Consumables Checklist:
- Bicycle-specific degreaser (citrus, solvent, or aqueous)
- Stiff-bristled brush (old toothbrush, dedicated bike brush)
- Plenty of clean rags or microfiber cloths
- Chain lube (dry, wet, ceramic, or wax – depending on conditions)
- Optional: Chain cleaning tool (clip-on device), chain wear indicator tool, nitrile gloves
- Optional (for off-bike clean): Quick-link pliers, chain breaker tool, work stand, plastic container/jar
Comparing bike chain cleaning methods
Selecting the right approach depends on how much dirt has accumulated, the tools available, and how much time you have. Each method offers different levels of thoroughness and convenience.
| Cleaning Method | Time Required | Cleaning Depth | Best Suited For | Main Trade-Off |
|---|---|---|---|---|
| Quick Rag Wipe | 2–3 minutes | Surface only | Dry road rides, post-ride upkeep, before re-lubing in dry conditions | Does not clean deep inside link rollers; only removes surface dirt |
| On-Bike Clip-On Tool | 5–10 minutes | Moderate to high | Routine weekly maintenance, light to moderate grime, at-home convenience | Can splash degreaser onto disc brakes if uncareful; requires specific tool |
| On-Bike Manual Scrub | 10–15 minutes | Moderate | Light mud, road grit buildup, when you don’t have a clip-on tool | Requires manual effort and careful rinsing; more prone to mess |
| Off-Bike Container Shake | 20–30 minutes | Deep and thorough | Heavy winter mud, wet commuting grit, old sticky wet lube, rust removal | Requires master link removal tools and patience; chain reinstallation needed |
How to clean your bike chain at home without removing it (step-by-step)
For most cyclists, an on-bike clean provides the ideal balance between thoroughness and convenience. This method cleans the chain without requiring you to remove links or use specialized chain pliers. It’s also the best method for cleaning your bike chain at home without removing it.
- Prepare your bike: Place your bicycle in a repair stand or lean it securely. Shift the chain into the outer (largest) chainring at the front and a middle cog on the rear cassette. This maintains adequate chain tension and provides clear access. If you have disc brakes, cover your rotors to prevent degreaser contamination.
- Clean adjacent components first: Scrape heavy grime off the rear derailleur jockey wheels with a flat tool or plastic scraper. Floss between cassette cogs using a rag edge or cassette brush. Cleaning these parts first prevents dirty residue from re-contaminating your chain.
- Apply degreaser: Spray or apply degreaser directly onto the lower chain run while slowly back-pedalling. Ensure even coverage. Allow the degreaser to sit for two to three minutes to penetrate and loosen stubborn grease. For a chain with rust, let the degreaser dwell longer and focus scrubbing on rusted areas.
- Scrub the chain: If using a clip-on chain cleaning tool, fill its reservoir with degreaser, snap it around the chain, and back-pedal for 20 to 30 rotations. If scrubbing manually, clamp a stiff-bristled brush over the top and sides of the chain while back-pedalling, ensuring you scrub both the inner and outer link plates and rollers.
- Rinse thoroughly: Spray the chain with a gentle stream of clean water from a hose or spray bottle until the water runs clear. Avoid using high-pressure power washers directly aimed at wheel bearings, bottom brackets, or derailleur pivots, as this forces water past seals, washing away protective grease.
- Dry completely: Wrap a clean, dry microfibre cloth tightly around the bottom section of the chain and pedal backward until no water or dark residue transfers to the rag. For best results, let the chain air dry for 10–15 minutes, or longer in humid conditions, before applying fresh lubricant. A leaf blower or compressed air can speed up drying, but avoid directing strong blasts at bearings.

How to do an off-bike deep clean (and clean your chain and cassette)
When a chain is coated in thick off-road mud, heavy road salt, or old sticky wet lube, removing it from the bicycle offers the deepest clean possible. This method allows full immersion and agitation inside a sealed container, and is ideal for cleaning your bike chain and cassette together.
Removing the chain with a master link
Most modern 8, 9, 10, 11, and 12-speed chains feature a master link (also called a quick link). To open a master link:
- Locate the master link along the chain loop; it looks distinct from standard links.
- Position the tips of quick-link pliers into the inner link openings on either side of the master link pins.
- Squeeze the pliers together to release the locking tension and slide the link plates apart.
If your chain lacks a master link, you will need a chain breaker tool to drive out a link pin. Installing a quick link upon reassembly is recommended for future maintenance ease. Note that many 11-speed and 12-speed quick links are designated as single-use by manufacturers and should be replaced once disconnected.
Soaking and agitating the chain
- Place the removed chain inside a broad-mouth plastic container or glass jar.
- Pour in enough bicycle degreaser to fully submerge the chain. For heavily soiled chains, you can use a stronger solvent-based degreaser here, as it’s isolated from other bike components.
- Seal the container tightly and shake vigorously for 60 seconds to force degreaser deep inside the internal pin bushings.
- Let the chain soak for 15 to 20 minutes to dissolve hardened deposits. For extremely dirty or rusted chains, you may extend the soaking time or repeat the process with fresh degreaser.
- Remove the chain, scrub any remaining surface spots with a stiff toothbrush, and rinse thoroughly with clean water until all degreaser and grime are gone.
- To ensure all water evaporates, dry the chain with a microfibre towel and optionally perform an isopropyl alcohol rinse, which displaces trapped moisture before evaporating completely. This step is critical to prevent internal corrosion.
Reinstalling the chain correctly
Thread the clean chain back through the front derailleur cage, around the chainring, through the rear derailleur pulleys, and over the cassette. Check manufacturer markings: directional chains must be routed so that printed logos face outward. Reconnect the master link plates and pull the chain firmly to click the pins locked into place. Give the pedals a few rotations to ensure smooth movement.
How to clean bike chain and gears (cassette, chainrings, jockey wheels)
Placing a spotlessly clean chain onto dirty drivetrain components immediately transfers trapped grit back onto your fresh chain. A full maintenance routine includes cleaning the entire gear system, especially when performing a deep clean of the chain.
Jockey wheels
The small plastic pulley wheels on your rear derailleur attract a thick crust of grime. Hold a flathead screwdriver or plastic scraper gently against the edge of each jockey wheel while back-pedalling to shave off accumulated sludge. Finish by wiping the pulleys clean with a degreaser-soaked rag. For a deeper clean, you can remove the jockey wheels (often with a 3mm or 4mm hex key), clean them individually, and reinstall.
Cassette cogs
Dirt packs tightly into the gaps between individual cassette sprockets. Take a strip of rag or microfibre cloth, pull it taut, and slide it between adjacent cogs in a shoe-shine motion. For heavily soiled cassettes, use a serrated plastic cassette claw to pull out compacted debris before flossing with a rag. If you’ve removed your chain, this is also a great time to remove the rear wheel and clean the cassette more thoroughly off the bike, using a stiff brush and degreaser. Rinse well before reinstalling.
Chainrings
Wipe down both sides of your front chainrings using a rag dampened with degreaser. Inspect the valleys between chainring teeth and scrape out any caked dirt with a stiff brush. Ensure you clean the inner faces of the chainrings as well, which can accumulate a surprising amount of grime.
How to lubricate your chain after cleaning
A freshly cleaned chain is raw, unlubricated metal. Without immediate lubrication, steel chain components will develop surface rust rapidly. Proper lubrication reduces friction, prevents wear, and keeps gear shifts quiet.
Selecting the right lubricant type
Choose a lubricant appropriate for your riding conditions. The main formulas include:
- Dry lubricants: Feature wax or PTFE in a fast-evaporating solvent. They leave a slick film that resists dust and grit. Ideal for dry, dusty conditions, but wash away easily in wet weather and require frequent reapplication. They keep your chain cleaner for longer.
- Wet lubricants: High-viscosity synthetic oils that resist water spray and stay effective through heavy rain, snow, and mud. They attract dust and require more frequent washing to prevent paste buildup, but are more durable in harsh conditions.
- Ceramic lubricants: Synthetic oils infused with ceramic nanoparticles that reduce friction and extend lube longevity. Available in both wet and dry formulas, they offer enhanced durability and reduced friction, often at a higher cost.
- Drip waxes: Liquid emulsions containing refined paraffin wax that dry into a hard protective barrier. They provide low friction and keep chains exceptionally clean, though they require a completely degreased chain before initial application to bond properly.
Step-by-step lube application
This process applies whether you’re using traditional wet/dry lubes or drip wax.
- Ensure the chain is completely dry: This is the most crucial step. Moisture inside the rollers prevents oil or wax from adhering, leading to internal corrosion and accelerated wear. If in doubt, let it dry longer or use an isopropyl alcohol rinse.
- Position the lube bottle: Position the tip of the lube bottle directly over the lower chain run above a chainstay.
- Apply precisely: Apply exactly one small drop of lubricant directly to the top of each individual roller while slowly back-pedalling. Avoid squeezing a continuous stream, as this wastes product and attracts more dirt.
- Distribute the lube: Continue back-pedalling for 20 to 30 rotations to allow the lubricant to penetrate deep into the internal pin and bushing assemblies. Shift through all your gears a few times.
- Allow penetration: Let the lubricant sit for 5 to 10 minutes so carrier solvents can evaporate or penetrate.
- Wipe off excess: Firmly grip the chain with a clean, dry rag and pedal backward for several turns to wipe away all exterior lube from the outer side plates. Lubricant on the outside of a chain serves no functional mechanical purpose; it only attracts ambient dirt and dust. Your chain should look almost dry on the outside.
Common chain cleaning errors and how to avoid them
Even well-intentioned maintenance can cause unintended damage if performed incorrectly. Avoid these common mistakes:
- Over-lubricating: Applying too much lubricant or failing to wipe off the excess coats outer link plates, turning your chain into a dirt magnet. The lube needs to be *inside* the rollers, not on the outside.
- Trapping moisture inside rollers: Applying lubricant over a damp chain traps water inside the pin bushings, causing internal corrosion and accelerated wear. Always ensure the chain is bone dry before lubricating.
- Using harsh automotive solvents: Brake cleaners, paint thinners, petrol, or strong industrial degreasers can strip grease from internal bearing seals, damage frame finishes, and degrade rubber seals. Stick to bicycle-formulated degreasers.
- Blasting with high-pressure washers: Directing high-pressure water directly at drivetrain components forces water past bearing seals, washing away protective grease. Use a gentle stream from a hose or a spray bottle.
- Ignoring chain stretch: Cleaning a severely stretched chain will not restore crisp shifting. Always measure wear regularly; a worn chain will quickly damage a new cassette.
- Cleaning without cleaning other drivetrain components: Putting a perfectly clean chain onto a dirty cassette, chainrings, and jockey wheels will immediately re-contaminate your chain. Always clean the entire drivetrain.
How do you know when your bike chain is too worn?
As chain pins and bushings wear down, the pitch between chain links increases. A chain wear indicator tool measures this elongation to tell you when it is time to replace the chain before it ruins your cassette. This is more reliable than visual inspection or waiting for shifting problems.
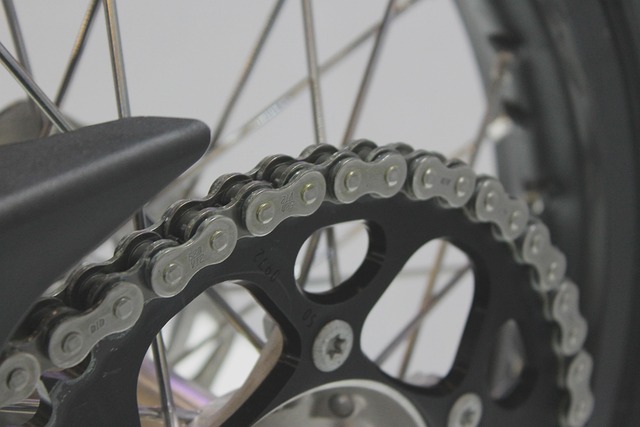
Insert the chain wear indicator tool gauge drops into the chain links:
- 0.5% wear threshold: Replace 11-speed, 12-speed, and 13-speed chains when the gauge drops in at 0.5% elongation to protect expensive lightweight cassettes. These narrower chains are more sensitive to wear.
- 0.75% wear threshold: Replace 8-speed, 9-speed, and 10-speed chains when elongation reaches 0.75%. These slightly wider chains are more tolerant of wear before damaging cogs.
- 1.0% wear threshold: If elongation reaches or exceeds 1.0%, the cassette cogs are likely already worn and will need to be replaced along with the new chain.
Sources: Bicycle chain
Frequently asked questions
Can I use dish soap to clean my bike chain?
While dish soap can break down grease, it’s generally not recommended for bike chains. It can strip away essential protective oils and may not be strong enough for hardened road grime or mud. Bicycle-specific degreasers are formulated to be effective without causing damage, and they rinse more cleanly without leaving residues.
Do I need to remove my chain to clean it?
No, you don’t always need to remove it. A quick on-bike clean with a degreaser and brush is often sufficient for regular maintenance, and is much faster. However, for a truly deep clean, especially after very dirty rides or for rust removal, removing the chain offers superior results.
How long should a bike chain last?
A bike chain can last anywhere from 1,000 to 5,000 miles, depending heavily on maintenance, riding conditions, and the quality of the chain. Regular cleaning and proper lubrication, along with timely replacement when worn using a chain wear indicator, will help maximize its lifespan and prevent damage to other components.
What happens if I don’t clean my bike chain?
An uncleaned chain will grind loudly, shift poorly, and accelerate wear on your cassette, chainrings, and jockey wheels due to abrasive grit. This can lead to premature replacement of these more expensive components, increased pedaling friction, and a generally unpleasant riding experience.
Is chain wax better than chain lube?
Chain wax creates a cleaner running chain because it doesn’t attract dirt like traditional wet lubes, making your drivetrain look tidier. However, it typically requires a perfectly degreased chain for initial application and more diligent reapplication, and can be less effective in very wet conditions. For many, traditional lubes are more practical for everyday use, but wax offers significant benefits for those committed to its specific maintenance routine.
Source: Britannica.