
 By Hashim Hashmi
Choosing the right road bike saddle is crucial. It ensures comfort, improves power transfer, and prevents pain. First, match its width to your sit bones. Also, select a shape that suits your riding style. A properly fitted saddle supports your pelvis. It ensures stable pedalling. As a result, you can maintain an efficient, aerodynamic posture on long rides.
Road Bike Saddle: How to Choose, Size, and Adjust for Lasting Comfort
To choose the right road bike saddle, match the saddle width to your measured sit bone spacing. This fully supports your pelvis without chafing. Select a flat profile for dynamic positions. Or, choose a waved cutout design. This relieves perineal pressure during aggressive, low-front rides.
Your saddle is the primary weight-bearing contact point between your body and the frame. An ill-fitting saddle leads to soft tissue compression, saddle sores, lower back fatigue, and knee strain. A well-matched saddle lets you maintain an aerodynamic, efficient posture, maximising power output and long-distance comfort.
Why saddle fit determines your comfort and power output
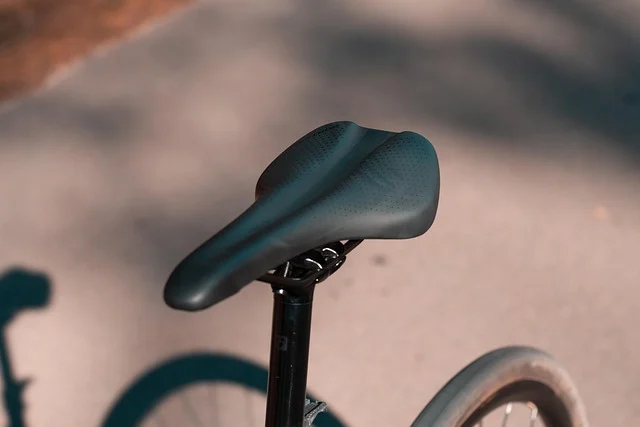
When you ride, your pelvis bears weight. It primarily uses your ischial tuberosities, or sit bones. A properly sized saddle provides a stable foundation for these bones. As a result, your glutes and hamstrings can transfer pedalling power. This power goes directly into the drivetrain. Your hips will not rock or tilt improperly.
If the saddle is too narrow, your sit bones overhang the edges. This shifts weight onto the sensitive perineal region. It causes numbness or discomfort. If the saddle is too wide, your inner thighs rub against the outer wings. This leads to irritation. Correct saddle choice protects soft tissue. In addition, it improves pedalling performance.
What size road bike saddle do I need? (How to measure sit bone width at home)
Selecting the ideal road bike saddle begins with determining your sit bone measurement. You can measure this distance accurately at home using simple materials.
- Prepare a firm surface: Place a piece of thick corrugated cardboard. Alternatively, use a gel memory foam cushion. Put it on a hard, flat bench or uncarpeted step.
- Assume riding posture: Sit upright. Keep your feet flat and knees bent at a 90-degree angle. Lean slightly forward at your hips. This replicates your riding angle. Then, pull downward firmly on the seat base for five seconds. This presses your sit bones into the surface.
- Mark the indentation centres: Stand up and locate the two deepest circular indentations left by your pelvic bones. Use a fine-tip pen to draw a dot in the exact centre of each impression.
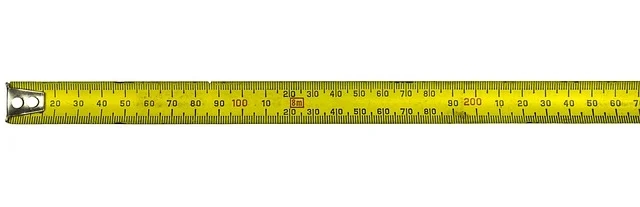
- Measure the distance: Measure the precise distance between the two dots in millimetres using a ruler.
- Calculate target saddle width: You should add 20mm to 30mm to your sit bone distance. This finds your recommended saddle width. For example, a rider with a 110mm sit bone measurement usually fits a 130mm to 140mm saddle. However, a 135mm sit bone width requires a 155mm to 160mm saddle.
What if I don’t have a sit bone measurement tool?
Many bike shops offer professional sit bone measuring tools. You can also buy online without measuring. If you do, consider starting with a medium width, such as 142mm. Then use the saddle’s return policy if it feels uncomfortable. Always measure first; it is the most reliable step.
What saddle profile and shape matches your riding style?
Saddle width determines structural support, but saddle shape dictates how comfortably your body moves during sustained riding. Saddles generally feature one of three primary longitudinal profiles, alongside variations in nose length and central relief.
Flat saddles
Flat saddles have a straight horizontal profile. This runs from tip to tail. They suit flexible riders. These riders like to shift their seating position frequently. They slide forward onto the nose for high cadence on flats. Also, they move back over the tail for climbs. These saddles promote varied positions. As a result, they are less restrictive for riders who naturally move around.
Waved and curved saddles
Waved saddles feature a distinct dip in the central platform. They also have a raised tail section. This shape cradles your pelvis. It holds you in a stable, consistent position. These saddles work well for riders with limited hamstring or lower back flexibility. Such riders tend to rotate their pelvis backward on the bike. The curved profile helps you maintain a consistent, efficient pedaling posture.
Short-nose saddles
Short-nose saddles are around 240mm long. In contrast, traditional saddles are 275mm long. Manufacturers trim the nose. They also widen the central relief channel. These models allow you to rotate your pelvis forward. This creates an aggressive, low aerodynamic position. You avoid excessive pressure on soft tissue. Also, you do not ride on a narrow tip. These saddles are popular for time trials, triathlons, and aggressive road racing. Maintaining a deep aero tuck is key for these activities.
Central cutouts and relief channels (Why are road bike saddles so uncomfortable without them?)
Cutouts remove material from the center of the saddle base. This prevents compression of the perineal artery and pudendal nerve. If you suffer from genital numbness or pain, consider a cutout. This is especially true when riding in the lower handlebar drops. Therefore, a full central cutout or deep continuous channel is highly recommended. Without these features, pressure on sensitive soft tissues can cause discomfort. This pressure, especially when leaning forward, can also cause numbness and long-term issues.
Comparing road bike saddle rail and shell materials
Saddle construction affects several factors. It impacts weight, vibration absorption, and shell flex. It also influences long-term durability. Shell bases are constructed from nylon or carbon-reinforced composites. Meanwhile, rails range from steel to high-modulus carbon fibre.
| Rail & Shell Setup | Average Weight | Flex & Comfort | Durability | Best Used For |
|---|---|---|---|---|
| Chromoly / Steel Rails + Nylon Shell | 260g – 320g | Moderate flex, absorbs road buzzing well | Very high durability, impact resistant | Budget builds, daily commuting, endurance riding |
| Titanium Rails + Carbon-Injected Shell | 200g – 240g | Excellent vibration damping, tuned flex | High corrosion resistance, durable | Long-distance road riding, sportive events |
| Full Carbon Rails (7x9mm) + Carbon Shell | 115g – 170g | Stiff base, maximum power transfer | Requires torque wrench; sensitive to side impacts | Competitive road racing, hill climbs, weight-saving builds |
| 3D-Printed Polymer Matrix + Carbon Base | 160g – 210g | Zoned cushioning (soft nose, firm tail) | Weather-resistant, high cost threshold | High-mileage riders needing targeted pressure relief |
Padding choice is equally critical. Heavy gel padding feels soft at first. However, it compresses under body weight over long distances. This pushes material into soft tissue areas. It also causes heat buildup and chafing. High-density polyurethane or EVA foam provides firm, consistent structural support. Modern 3D-printed polymer matrices replace traditional foam entirely. They offer variable damping density across different saddle zones.
Why are road bike saddles so hard?
Road bike saddles are often firm, not soft. This firmness provides consistent support for your sit bones over long distances. Soft, thick padding initially feels comfortable. However, it compresses over time. This pushes material into sensitive perineal areas. It also creates hot spots, numbness, and chafing. A firm saddle, correctly sized and shaped, supports your skeletal structure. This allows soft tissues to remain uncompressed.
How to set up and adjust your road bike saddle (Height, angle, and fore-aft position)
Even the correct road bike saddle will cause discomfort if installed at an improper height, tilt, or fore-aft position. Make small adjustments incrementally and re-test on short rides.
- Set saddle height (How high should a road bike saddle be?): Sit on the bike with one heel resting on the pedal at the lowest point of the pedal stroke (6 o’clock position). Your leg should be fully straight without your hip dipping down. When clipped in with cycling shoes, your knee will retain a slight bend (25 to 35 degrees of knee flexion) at the bottom of the stroke. Too high risks rocking hips and chafing; too low reduces power and can cause knee pain.
- Set fore-aft position (Where should a road bike seat be?): Rotate the crank arms. They should be horizontal at the 3 o’clock position. Hang a plumb line from your front knee joint. The line should pass directly through the center of the pedal axle. Adjust the saddle rails forward or backward. Move them in the seatpost clamp until this alignment is achieved. As a result, your knee will be optimally positioned over the pedal spindle. This ensures efficient power transfer and prevents knee strain.
- Set tilt angle (Road bike saddle angle): Place a straight board across the saddle top. Position a digital level on top of it. Start with the saddle completely level (0 degrees). However, if you experience front-end pressure when riding in the handlebar drops, tilt the nose down. Tilt it by 1 to 2 degrees. Avoid tilting downward more than 3 degrees. This causes your body to slide forward. As a result, it places excessive strain on your hands, wrists, and shoulders. Excessive upward tilt can put pressure on soft tissues.
- Torque clamping bolts correctly: Standard round metal rails (7x7mm) use standard clamp torque settings (5–7 Nm). Carbon rails feature an oval 7x9mm profile and require compatible seatpost clamp plates. Always use a torque wrench to tighten carbon rail bolts according to manufacturer specifications (typically 6–8 Nm) to avoid crushing the structural carbon fibers.
Common road bike saddle problems and how to solve them (Why are road bike saddles so uncomfortable?)
Identifying the root cause of saddle pain allows you to fix the problem through targeted adjustments or hardware changes.
Perineal numbness or tingling
Numbness indicates nerve compression or restricted blood flow in the genital region. Lower your saddle nose by 1 degree, or select a short-nose saddle with a generous central cutout channel to relieve central pressure. Ensure your saddle height isn’t too high, causing you to rock your hips and increase pressure.
Chafing and inner thigh skin irritation
Chafing happens when your inner thigh skin rubs against the saddle wings. It also occurs when an overly high saddle forces your pelvis to rock side to side. First, check your saddle height. If the height is correct, transition to a saddle with a narrower midsection profile. Also, wear quality padded cycling shorts with anti-friction chamois cream. Ensure your shorts are clean and fit well. Bunched fabric can also cause chafing.
Saddle sores and skin breakdown
Saddle sores result from friction, bacteria, and excessive pressure points. Ensure your saddle padding is firm rather than thick and soft, wash cycling kit immediately after every ride, and lower your saddle by 2mm to 3mm if your hips move during pedalling. Good hygiene and a well-fitting chamois are critical. If sores persist, consult a doctor.
Hand, wrist, and shoulder strain
If your hands or wrists ache after short rides, check your saddle. Your saddle nose may be tilted down too far. This causes you to slide forward. As a result, you support too much weight with your upper body. Return the saddle to a level position. This keeps your weight centered over your sit bones and core muscles. It also takes force off your upper body. Also, check your reach to the handlebars. If it’s too far, you might be stretching excessively.
Lower back pain
Lower back pain can stem from an incorrect saddle height. This means it is either too high or too low. It can also come from an improper fore-aft position. Furthermore, a saddle shape that does not support your natural pelvic tilt can cause pain. A saddle that is too high forces your hips to rock. Conversely, one that is too low can overwork your hamstrings and glutes. A curved saddle might help you if you have limited flexibility. This is especially true if you tend to round your lower back.
How anatomical differences affect men’s and women’s saddle choice
Pelvic anatomy varies between individuals, but general structural differences influence saddle design. Women typically have wider sit bone spacing and a broader pubic arch, often calling for saddle widths between 150mm and 160mm. Women-specific saddles frequently incorporate wider relief cutouts that extend further forward to alleviate labial compression.
Men generally have narrower sit bone spacing, benefiting from saddle widths between 130mm and 145mm. Men’s cutouts target the central perineal zone to safeguard blood flow and reduce prostatic pressure. However, individual variation is significant; always rely on your individual sit bone measurement and comfort, rather than gender stereotypes alone.
Road bike saddles for heavy riders
Heavy riders often benefit from saddles with firmer padding and robust rail materials. Look for saddles with chromoly or titanium rails, which offer excellent durability and vibration damping compared to entry-level steel or ultra-light carbon. A saddle with a slightly wider profile can also distribute pressure more effectively, preventing localised hot spots. Avoid overly soft gel padding, which can compress excessively and cause discomfort over time.
When to replace a road bike saddle?
There is no fixed expiry date for a saddle. However, you should consider replacement if you notice signs of wear or persistent discomfort. Replace your saddle if the padding becomes compressed or lumpy. Also replace it if the cover tears or wears through. You should also replace it if the shell cracks or the rails bend. If you experience new or recurring pain despite correct setup, your saddle may no longer suit your body or riding style. So, it is time to explore new options.
How much should you spend on a road bike saddle?
Road bike saddle prices range from under £50 to well over £300, driven primarily by weight, rail materials, and manufacturing tech.
- Under £50: Features steel rails and basic nylon shells with traditional foam padding. Functional and durable, but heavier (300g+) with basic ergonomic shaping. Suitable for casual riders or those on a very strict budget.
- £80 to £150: Offers the best value for most road cyclists. Features chromoly or titanium rails, carbon-reinforced nylon bases, high-density foam, and ergonomic cutouts at competitive weights (200g–250g). This range provides a significant improvement in comfort and performance for the majority of riders.
- £160 to £280: Designed for competitive racing. Combines full carbon rails with full carbon shells and thin, dense padding, lowering weight to sub-180g levels while offering high shell stiffness. These saddles prioritise minimal weight and maximum power transfer for serious performance.
- £280+: Uses advanced 3D-printed liquid polymer matrix covers over carbon shells. Provides zone-specific cushion density for maximum comfort on ultra-distance rides, though at a premium cost. These are for riders seeking the ultimate in targeted pressure relief and cutting-edge technology.
Sources: Wilderness Trail Bikes, A Comfortable Bicycle Saddle
Frequently asked questions
How do I know if my road bike saddle is the right width?
Your sit bones should rest firmly on the flat rear section of the saddle. If you feel pressure concentrated in central soft tissue or slide off the side edges, the saddle is too narrow; if your inner thighs chafe against the sides while pedalling, the saddle is too wide.
Do I need a saddle with a cutout?
You should use a saddle with a central cutout if you experience numbness, tingling, or pain. This can happen in your perineal area during or after rides. The open channel eliminates direct pressure on nerve paths and blood vessels. This occurs when you lean forward into the handlebars.
What is the difference between a short-nose and a long-nose saddle?
Short-nose saddles are around 3cm shorter than traditional models and feature a broader nose with a large central relief channel. This allows you to sit stably in an aggressive aerodynamic drop position without soft tissue compression, whereas long-nose saddles offer more room to slide back and forth across the saddle top.
Can I install a carbon-railed saddle on any seatpost?
Standard metal rails are round. They have a 7x7mm dimension. However, carbon rails feature an oval 7x9mm profile. They handle riding stresses. You must use a seatpost clamp designed for 7x9mm oval rails. Otherwise, using standard 7x7mm clamps can crush carbon rails. Always check compatibility. Also, use a torque wrench.
What’s the best road bike saddle?
The “best” road bike saddle is highly individual, as it depends on your unique anatomy, flexibility, riding style, and budget. There isn’t one universal best option, but rather the saddle that provides you with the most comfort and support based on your sit bone width, preferred shape (flat, waved, short-nose), and material choice.